Growing up in my fathers darkroom, he had no chairs. Simply a very long shelf made out of some cheap kitchen top sold at Lowes, held up on steel braces my grandfather made, drilled into the studs to hold the weight of the enlarger. It ran along the back most wall for the entire width of the bedroom he had converted. Tinfoil covered the rooms only window. I wish I had a picture. To the left on the floor lay a gigantic steel “sink” which to me as a young child looked like a gigantic steel bathtub of sorts. It was nearly as long as the back wall and had trays inside. I rarely saw it in a used state because with young children around my father was careful to put everything away when he was done. I remember the smell of his hands after he would come out of the darkroom, the tart smell of the chemistry.
This darkroom setup is top-notch-good-stuff. All in fantastic condition, with pretty much every piece of equipment I could possibly need save paper and chemicals. The table in the above shot, to the right is a sink with a custom built frame for it. Two owners ago it was built for a professional photographer, by the company he worked for I believe. It has two shelves and then the steel sink, which is basically a tub with a spot for a hose to hook up to drain water. This is placed in the back of my garage.

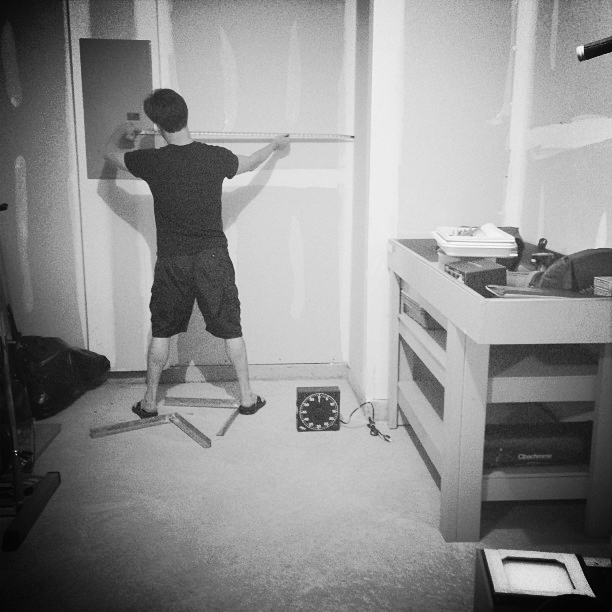
Now here is the shelf after it was installed into the steel braces. I purchased the shelf top at Lowe’s for $40 and did not have to get it cut (though in hind site I should have as it would have fit in that back recessed section better. This will be improved eventually but first we want to get everything up and running.
I’ve run into a bit of a problem with the enlarger. It shifted during travel and the spot that the enlarger head sits in is not aligned properly. Until we fix that, we will not be able to use the enlarger.

The enlarger is a Super Chromega Dichroic which can also be used for color processing. At this time we do not plan to do any color prints, though the setup included the drums needed to process color prints. We will most likely stick to B&W printing only.
The shelf should be placed at a comfortable hight for you to stand up and be looking down at its enlarger base comfortably. Technically speaking you only need space for the enlarger to sit but more space is always nice for you to store paper or prints.